How to Add Music in KineMaster
May 31, 2025 (7 days ago)

Adding music to your videos makes them more exciting, emotional, and professional. Whether you’re creating content for YouTube, TikTok, Instagram, or personal projects, KineMaster is a great tool for mobile video editing. This guide will show you how to add music in KineMaster step-by-step, even if you’re a complete beginner.
What Is KineMaster?
KineMaster APK is a simple and powerful video editing app used by beginners and professionals. It helps you edit videos on your phone with easy tools like cut, trim, add music, and text. You can also add effects, voiceovers, and filters. It supports high-quality video exports and works on Android and iOS. KineMaster is great for making YouTube videos, social media content, and personal projects without needing a computer.
Why Music Matters in Videos
Music is more than just background noise. it is the heartbeat of your video, shaping emotion, energy, and the viewer’s entire experience from start to finish.
Sets the Mood
Music helps create the right feeling happy, sad, exciting, or calm. It sets the emotional tone, guiding viewers through the story. Without music, scenes may feel flat or less impactful.
Boosts Engagement
Good music keeps viewers watching longer by adding rhythm and energy to the visuals. It helps maintain attention, builds anticipation, and makes scenes feel more dynamic and enjoyable to watch.
Improves Storytelling
Soundtracks support the message and emotions of the video. Music adds depth, enhances pacing, and connects scenes smoothly. It helps tell stories clearly, even without dialogue or narration.
Increases Memorability
Catchy tunes make videos easier to remember and share. Music sticks in the mind and often brings back visuals with it. A great soundtrack can make content go viral or iconic.
Adds Professional Touch
Background music makes videos look polished and professional. It fills silence, reduces awkward pauses, and elevates production quality. Viewers are more likely to trust and enjoy well-produced, music-enhanced videos.
Step 1: Install KineMaster on Your Device
Before you start editing, you need to install the app:
- Open Google Play Store or Apple App Store
- Search for “KineMaster”
- Tap Install
- Open the app once downloaded
- Allow necessary permissions (media, files)
Step 2: Create a New Project
To start adding music, create a video project first:
- Tap the “+” (Create New Project) button on the main screen
- Choose the aspect ratio (16:9 for YouTube, 9:16 for TikTok, etc.)
- Add your video clips or images to the timeline
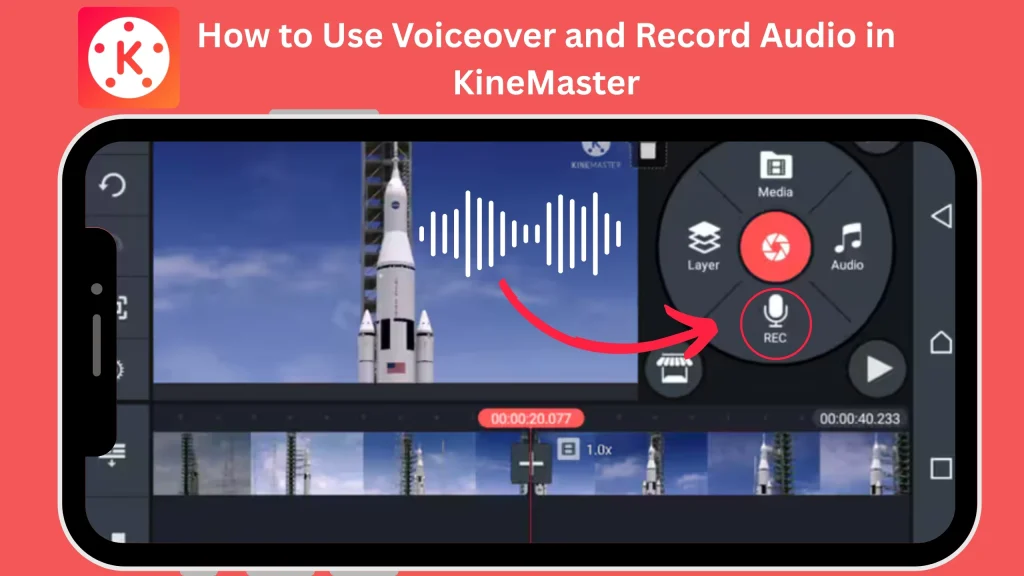
Step 3: Tap the ‘Audio’ Button to Add Music
Now comes the most important part—adding your music:
- Tap the Audio icon on the right side of the screen
- You will see different options like:
- Music browser (KineMaster’s built-in music tracks)
- Downloaded music from your device
- Sound effects
- Choose the music file you want to add
- Tap the “+” icon next to the track to add it to your timeline
Step 4: Adjust the Music Settings
Once your music is added, you can make changes to fit your video perfectly:
- Trim the Music: Tap the music track and use the handles to cut or trim.
- Change Volume: Tap the music layer, then tap the speaker icon. Set volume as needed.
- Fade In/Out: Use fade-in and fade-out options for smooth audio transitions.
- Loop Music: If your video is longer, you can duplicate the music layer or loop it.
- Move Position: Drag the track left or right to match it with the video flow.
Step 5: Preview and Fine-Tune Your Video
Before exporting your final video:
- Tap the play button to preview the full video with music
- Adjust volume levels so music doesn’t overpower voiceovers
- Make sure the music fits the mood and timing of the video
- You can also mute original clip audio if needed
Advanced Tips: Adding Multiple Audio Tracks
KineMaster allows you to layer multiple soundtracks:
- Add background music, voiceover, and sound effects on separate layers
- Tap Audio again to add more tracks
- You can control the volume of each layer independently
Step 6: Export Your Video
Once your music is perfectly added:
- Tap the Export icon (top-right corner)
- Choose resolution (720p, 1080p, 4K depending on your device)
- Select frame rate (30fps or 60fps for smoother motion)
- Tap Export
Why Choose KineMaster for Music Editing?
KineMaster stands out from other mobile editors because:
- Easy-to-use interface even for beginners
- Supports multiple audio layers
- Built-in music and effects
- Real-time audio preview
- Free version available
Fresh Features in KineMaster (2025)
KineMaster now offers new features in its latest update:
- AI-powered music suggestion
- Auto-sync audio to video cuts
- Voice filters and pitch control
- Smart trimming tool for background music
- Auto fade transitions
These features make editing music smoother and faster than ever before.
Best Uses of Music in KineMaster
Here are a few ideas where music can make your video shine:
- YouTube Vlogs
- Tutorials
- Product Reviews
- Instagram Reels
- Short Films
- Memes & Fun Edits
Final Thoughts
Adding music in KineMaster is a simple but powerful way to improve your video quality. It sets the mood, boosts engagement, and makes your content more professional. With KineMaster’s easy tools and fresh features in 2025, you can add background music, sound effects, and voiceovers with ease—even if you’re a beginner. Whether you’re editing a vlog, a TikTok, or a tutorial, music will bring your videos to life. Start creating today and make your videos stand out with sound!
Recommended For You