How to Create YouTube Videos Using KineMaster
May 31, 2025 (2 months ago)

KineMaster is one of the most powerful video editing app for mobile. It Is simple to use yet it offers many advanced features like trimming, cutting, adding sound and exporting in HD. Whether you are a beginner or an experienced YouTuber, KineMaster gives you full control over your content. You can edit anytime, anywhere using just your phone or tablet. With ready-made transitions, effects, and tools, it saves time and helps you make professional-quality videos quickly. It is the best all-in-one editor for creators who want fast, smooth and beautiful YouTube content.
Installing KineMaster on Your Mobile or Tablet
- Go to the App Store or Play Store
Open your mobile device, search for “KineMaster” in the store, and tap on the download or install button to start the process. - Launch the KineMaster App
Once installed, open the app from your home screen or app drawer. Give it the required permissions to access storage and microphone. - Create a New Account or Log In
You can use it without logging in, but for saving projects and using cloud features, create a KineMaster account or sign in using Google. - Choose Your Language & Interface Settings
Pick your language, enable tutorial tips (if you’re a beginner), and explore the clean and easy-to-understand user interface of KineMaster. - Get Ready to Start Your First Project
Tap on the “Create New Project” button, and you’re now ready to begin editing your YouTube video using all the features of KineMaster.
Choosing the Right Aspect Ratio and Project Settings for YouTube
Before editing, you must select the correct aspect ratio. For YouTube, the best aspect ratio is 16:9 (landscape). When creating a new project in KineMaster, it asks you to pick an aspect ratio. Choose 16:9 to make your video fit perfectly on YouTube screens. Next, set your video resolution. For HD, choose 1280×720, and for Full HD, select 1920×1080. Also, set your frame rate to 30fps or 60fps depending on your video type. If your content includes lots of motion, 60fps looks smoother. After setting the ratio and resolution, name your project and save. This ensures your video is clean, sharp, and optimized for YouTube upload without black bars or blur.
How to Trim, Cut, and Arrange Video Clips in KineMaster Easily
Editing your clips is simple in KineMaster. First, add your videos to the timeline. Tap on a clip and you will see tools like Trim, Split, and Delete. Use Trim to cut the start or end of a video. Use Split to divide a long clip into smaller parts. Drag and drop the clips on the timeline to rearrange them in the right order. Zoom in on the timeline for better control. These basic editing tools help clean up mistakes, remove unwanted parts and organize your story smoothly. It makes your final YouTube video professional and easy to follow.
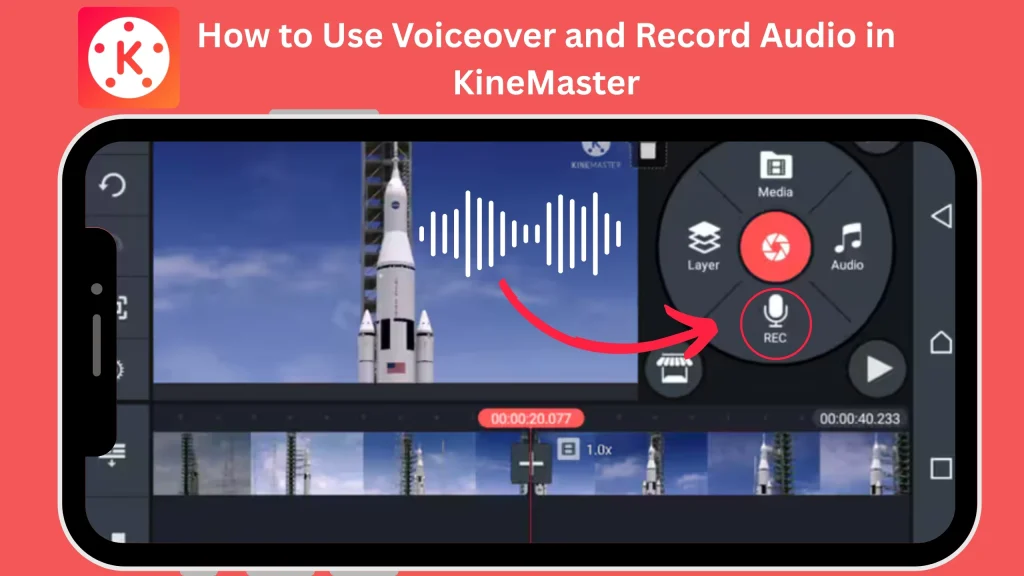
How to Add Background Music, Voiceovers, and Sound Effects
Audio is key for YouTube videos. To add background music, tap Audio, then pick a file from your device or use KineMaster’s music library. Adjust volume or fade in/out for smooth effects. For voiceovers, tap Voice and record your audio directly inside the app. This is great for tutorials or reactions. To add sound effects like claps, swipes, or beeps, go to the SFX section. You can also adjust timing to match video scenes. Clear audio makes your video more engaging and helps keep viewers watching till the end.
How to Export High-Quality YouTube Videos from KineMaster
After editing your video, it’s time to export it for YouTube. Tap the Export button (top-right corner). Choose Full HD (1080p) or HD (720p) for best quality. Set frame rate to 30fps or 60fps. You can also adjust bitrate – higher bitrate means better quality. Tap “Export” again and wait for rendering to finish. Once done, the video saves to your gallery. Now you can upload it directly to your YouTube channel. KineMaster’s export options ensure your video looks clean, sharp, and smooth – just like professional creators. No watermark if you’re using the premium version.
Conclusion
KineMaster is an excellent app for anyone who wants to create YouTube videos without a computer. It is fast, user-friendly and packed with powerful features. You can trim videos, add effects, insert music and export in high quality all from your phone. Whether you are making vlogs, tutorials, or gaming content, KineMaster helps bring your creative ideas to life. It is perfect for YouTubers who want easy, professional editing on the go. Try it today and see how simple it is to start your own YouTube journey with just a mobile device!
Recommended For You